Main Scanner tab
This is the main-scanner window. In this window you will find the following controls:
“Connect/Disconnect”: This button is used to connect/disconnect to a scanner HUD or deployed remote scanner inside secondlife. Please watch the First Time Usage video on this web-site to learn in-depth how to use this for the first time.
“Manager”: Clicking on the manager-button will bring up a Connection-Manager window:
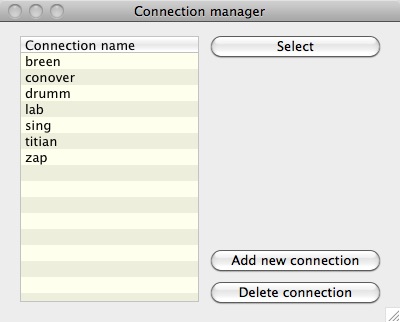
In this window you will be able to store frequently used connections to deployed Scanner-sensors and your wearable scanner HUD. Use this to quickly connect to all your scanners/Sims/Regions whenever you need to scan them. You can store and install an unlimited amount of scanners here. If you own/manage hundreds of Sim’s/Regions, no problem, this scanner can store them all. You can also connect to a unlimited amount of scanners at the same time (each connection will open a new window), so you can perform full-sim scans of as many sim’s/regions as you need at the same time.
Please watch the First Time Usage video on this web-site to learn in-depth how to use this for the first time.
“Commands...”: This popup-button contains more advanced commands you can use with the scanner:
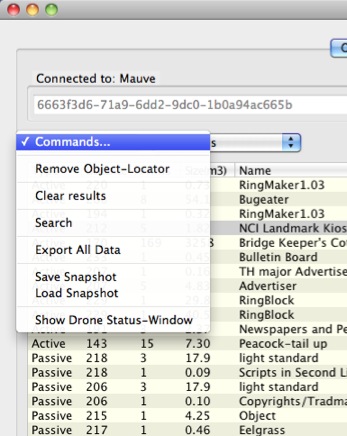
“Remove Object-Locator”: If you double-click on any object inside the big object list-view, a locator-drone will be automatically created inside secondlife. You can sit on this with your avatar and this object-locator will take you to the position where the object is located, and it will also emit a tiny red laser-beam to show you the exact position of the object. Use the “Remove Object-Locator” command to delete the locator after you are finished with it.
“Clear results”: If you want to start a completely new object-scan, then choose “Clear results” and all stored data in the scanner will be cleared from memory.
“Search”: Sometimes there are many thousands objects inside a SIM/Region. Activate the “Search” command to bring up an advanced search-window. In this search-window you will be able to search for partial-names of objects, owners, groups, creators, etc. Please read the section “Object Search Window” further down in this documentation to learn how to use the advanced search-system.
“Export All Data”: Sometimes you need to share your findings with your friends, co-owners of the Sim/Parcel etc. Use the “Export All Data” command to create a CSV or HTML export of all the data. Then you can easy save the results in a easy-to-read HTML format, and then send it with your email client or similar sharing technologies.
“Save Snapshot”: You can store the results for later use if you wish. By using the Save Snapshot, you will be able to load the snapshot into the scanner at a later time. This is very useful if you are analyzing a tremendous amount of objects, and want to continue where you left off at a later time.
“Load Snapshot”: This command loads a previously saved snapshot. Use this if you want to continue analyzing data from a previous snapshot you saved earlier. You can also compare two snapshots to easy detect changes in the SIM/Region. With the compare snapshot system you will instantly see what objects that has been deleted and created since last time you did a scan.
“Show Drone Status-Window”: When performing a Full-SIM scan, the scanner system will launch a number of special scanner-drones that will hunt down every single object in your SIM/Region. You can activate this command if you want to watch in real-time the progress of all these drones.
“All Parcels / Current Parcel Only”: This popup-selector is useful if you want to change the behavior of the scanner. By default, the scanner is set to scan the whole SIM/Region, regardless of how many parcels it contains. However, if you wish to speed up the scan, and only need data for the current parcel your scanner is located, you can then choose the alternative “Current Parcel Only”. Then all other parcels will be ignored.
“Start SIM Scan”: This button will bring up a new window where you can start a Full-SIM Scan or Parcel-Scan:
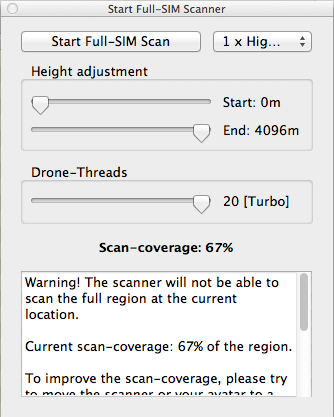
“Height Adjustment”:
In the “Start Full-SIM Scanner” window, you can adjust the minimum height (Start) and maximum height (End). By default it is set to scan the whole SIM/Region from ground zero up to 4096 meter height. You can easy use the sliders if you want to only scan parts of the sky, or only ground, etc.
“Drone Threads”:
This is the amount of simultaneous download-connections to the secondlife server the scanner will use when doing a full-sim scan. The higher you set this, the faster the scan will be. However, the more threads you use, the more CPU and bandwidth will be used on your computer during the scan.
Please bear in mind that if you use too many threads with a very slow computer or slow internet-connection, the scan might fail. If you experience problems, try to decrease the number of threads until your computer manages to handle the load.
Also bear in mind that if using the scanner in a homestead sim (cheap, slow sim/region), it might be best to use a low amount of threads since such homestead sims/regions might be so heavy loaded with scripts that it can not handle running in full-speed (max threads) mode. 5-10 threads is usually good for a Homestead SIM.
If you are unsure about the amount of threads to use, I suggest using 3-5 threads to be on the safe side. Altho, feel free to set it to maximum (20) just to see if it will work. The speed-benefits of using 20 threads is quite considerable and may speed up the scan up to 200-300% depending on your computer hardware and internet connection.
“Map”: The “map” popup-menu button will show you various settings and commands to adjust how the realtime map will work:
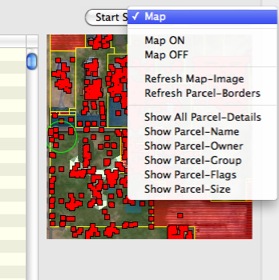
“Map OFF”: Use this command to HIDE the map from view. This is good if you have limited amount of screen-size and do not need to see the map at all times.
“Map ON”: This command will turn the map visible again.
“Refresh Map-Image”: If the map-image seems to be old or outdated, use this command to force the scanner to download a fresh map-image from the secondlife servers.
“Refresh Parcel-Borders”: By default all the parcel-shapes and data is stored locally in a cache. The local cache usually refreshes itself after 24 hours. You can use this command to force it to refresh more often if needed.
“Show All Parcel-Details”: By default, when you hover your mouse over the map it will show all important details about the parcel.
“Show Parcel-Name”: Select this option if you only want to show the parcel-name when hovering over the map with your mouse.
“Show Parcel-Owner”: Select this option if you only want to show the parcel-owner name when hovering over the map with your mouse.
“Show Parcel-Group”: Select this option if you only want to show the parcel-group name when hovering over the map with your mouse.
“Show Parcel-Size”: Select this option if you only want to show the parcel-size when hovering over the map with your mouse.
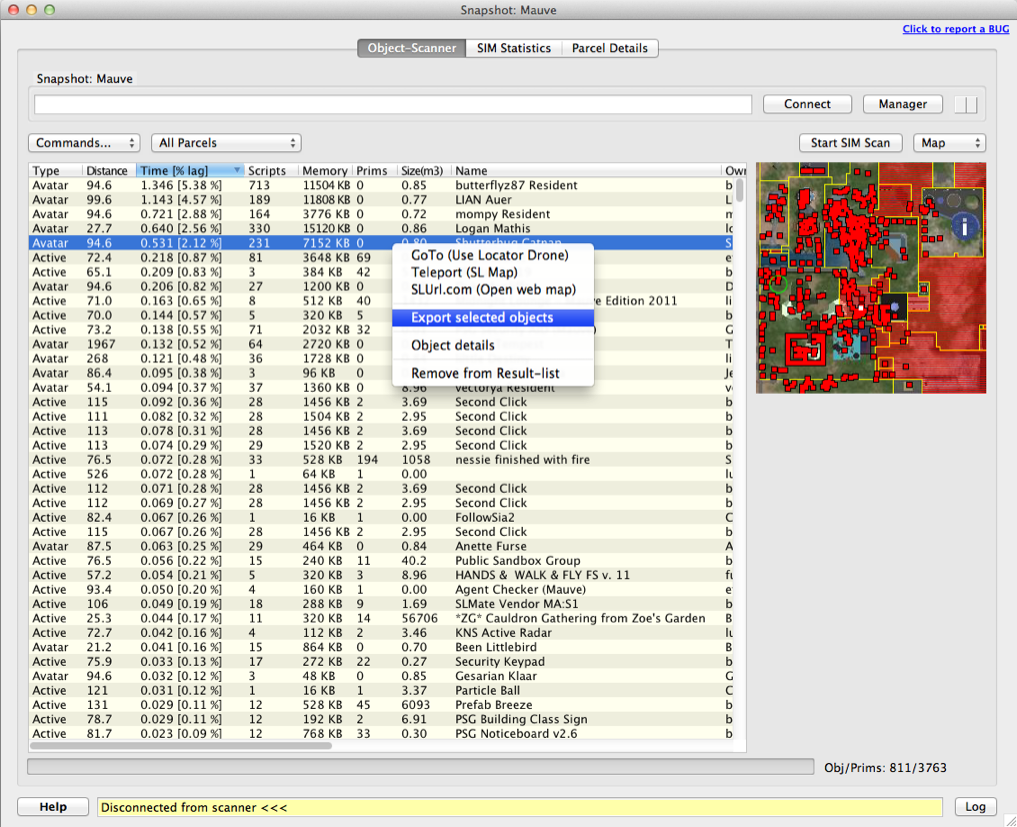
The big object-list in the middle of the window will show you detail-information about all found objects. This list will give you quick information about the following data for each object:
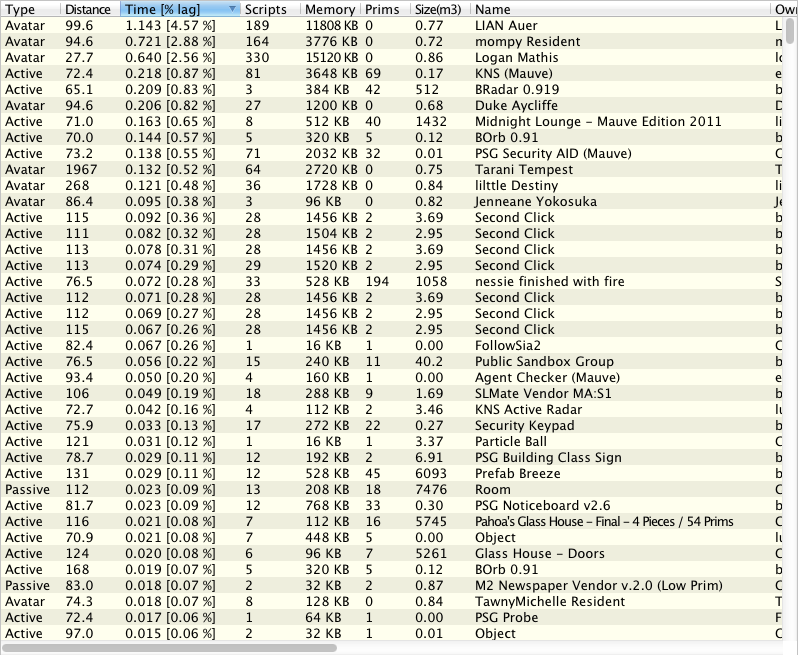
“Type”: “Active” means the object has a active script in it. Active scripts are scripts that runs with timers, listens for chat commands, vehicles/moving objects, etc. “Passive” means the object does not contain a script, or contains a script that only works if someone sits on it, or clicks on it. Passive scripts does NOT listen to chat commands, and it does NOT contain any timer-functions.
“Distance” : The distance in metric meters from the object and your avatar/scanner position.
“Time [% Lag]” : Shows exactly how much CPU-Time and Lag the object is generating. It’s identical to the “Time” field in Estate-Tools for Private SIM Owners.
“Scripts” : The number of running scripts in each object. (The higher amount of scripts, the higher lag the object may cause.)
“Memory” : The amount of memory each object consumes in the SIM/Region. The higher amount of memory consumed, the higher amount of lag it may cause. Specially if the total amount of memory consumed by all objects combined in the whole SIM exceeds several hundred megabytes.
“Prims”: The amount of prims the object has.
“Size(m3)”: The physical size the object consumes, measured in cubic meters.
“Name”: The full name of the object.
“Owner”: The full name of the OWNER of the object. (The person who put it out on the land)
“Creator”: The full name of the CREATOR of the object. (The person who created/sells the object/product in his/hers shop)
“Group”: The group-tag of the object.
“X/Y/Z”: The exact position of the object. Rounded down/up to the closest whole meter.
“ParcelName” : The name of the parcel the object is located at.
You can right-click on each object in the list to bring up an advanced command-menu for each object:
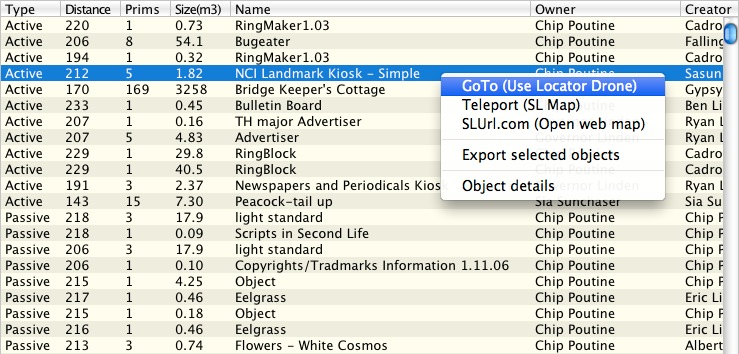
“GoTo”: If you choose this command, a locator-drone will be created in secondlife. You can then SIT on this drone to make it instantly take you to the exact position of the object. The locator-drone will also use a laser-pointer to show you the exact object. This is very useful when you try to find very tiny objects.
“Teleport”: This command requires you to be logged into secondlife while using it. When you select “teleport”, the map inside secondlife will automatically pop up with the exact position of the object. Then you can use the map itself to teleport to the exact position. Use this command if you are unable to rez/create locator-drones in the area.
“SLUrl.com”: This command opens up a web-based map in your web-browser.
“Export selected objects”: You can select multiple objects at a time, and use the export selected objects if you only want to export parts of your findings. You can export into CSV or HTML format.
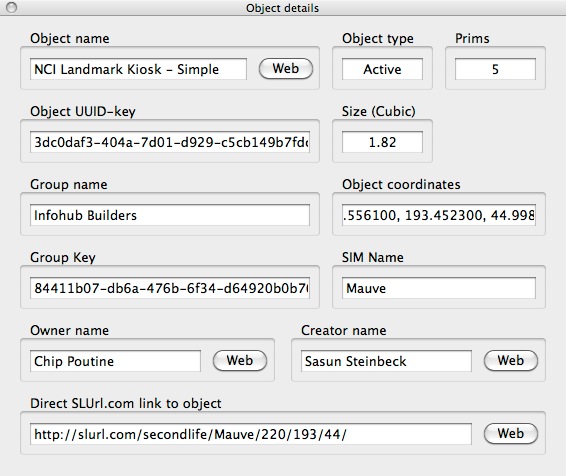
“Object details”: This command will bring up a new window with more detail-information about each object:
Direct Map Controls
You can also interact directly with the map itself by left/right-clicking on it:
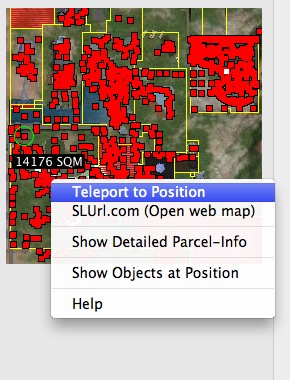
“Teleport to Position”: Left-click on the map and select “Teleport to Position” to be able to go directly to the exact spot on the map with your avatar.
“SLUrl.com”: This is an alternative way of teleporting to the same position as the “Teleport” command.
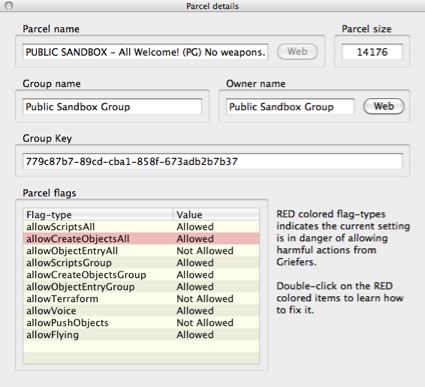
“Show Detailed Parcel-Info”: Brings up a new window with detailed information about the parcel at the map-position. Please read further down in this documentation to get more information about this.
“Show Objects at Position”: This command will bring up a new advanced search-window that will show you all objects that are close to the mouse-position on the map. Use this to easy investigate exactly whats hiding at the location.
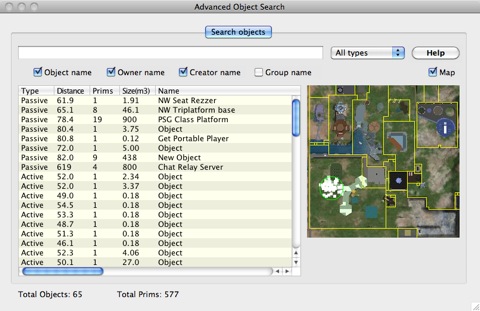
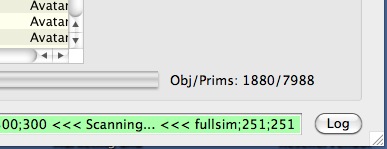
At the lower right side of the main object-window you will see the total amount of objects and prims: